Activity Forms
Overview
Forms are built using the Data Model defined in the previous step, Data Modeling, of the Process Wizard.
The context entity of the Process is the starting point to access the data model, and therefore to each attribute that will constitute your Form.
Go to the third step of the Process Wizard and click on Define Forms to display the workflow of the Process.
All human tasks that require a Form will be enabled. All other elements in the Process will be disabled as they do not receive any user input.
All activities that still need a Form associated will be highlighted with an exclamation mark as shown in the image below.
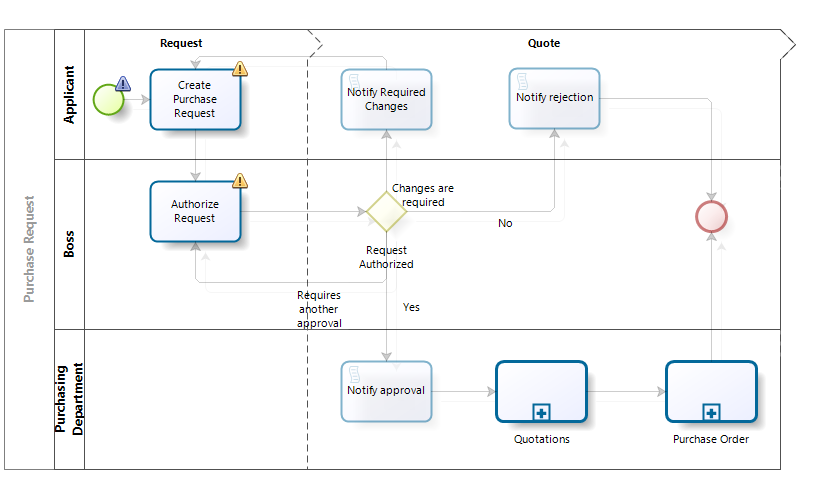
Example
Imagine a Purchase Request where employees request goods and services. The Process model is displayed in the image above.
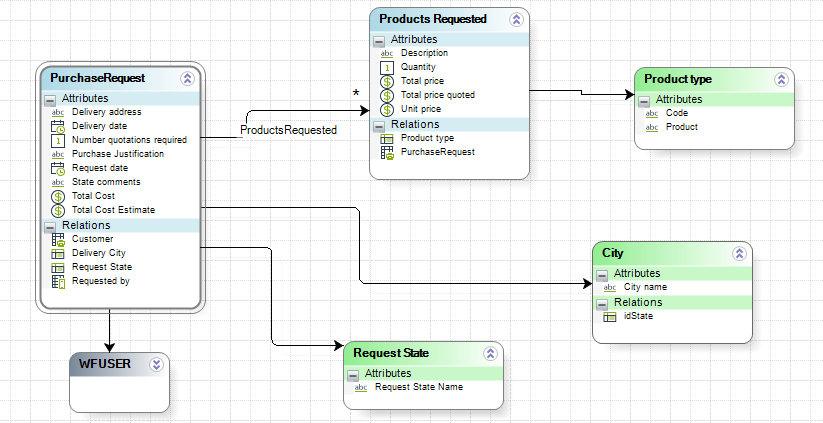
The first activity of the Process is where the Requester enters all the required request information. To create this first Form, we need to list what data must be displayed for this user interaction:
- Request information: Request date, name of the requester, and a purchase justification.
- Items requested: A table with the goods or services requested.
- Delivery information: Delivery address, delivery date, and delivery city.
Our Forms will be built based on the following data model:
Steps to Create a Form
-
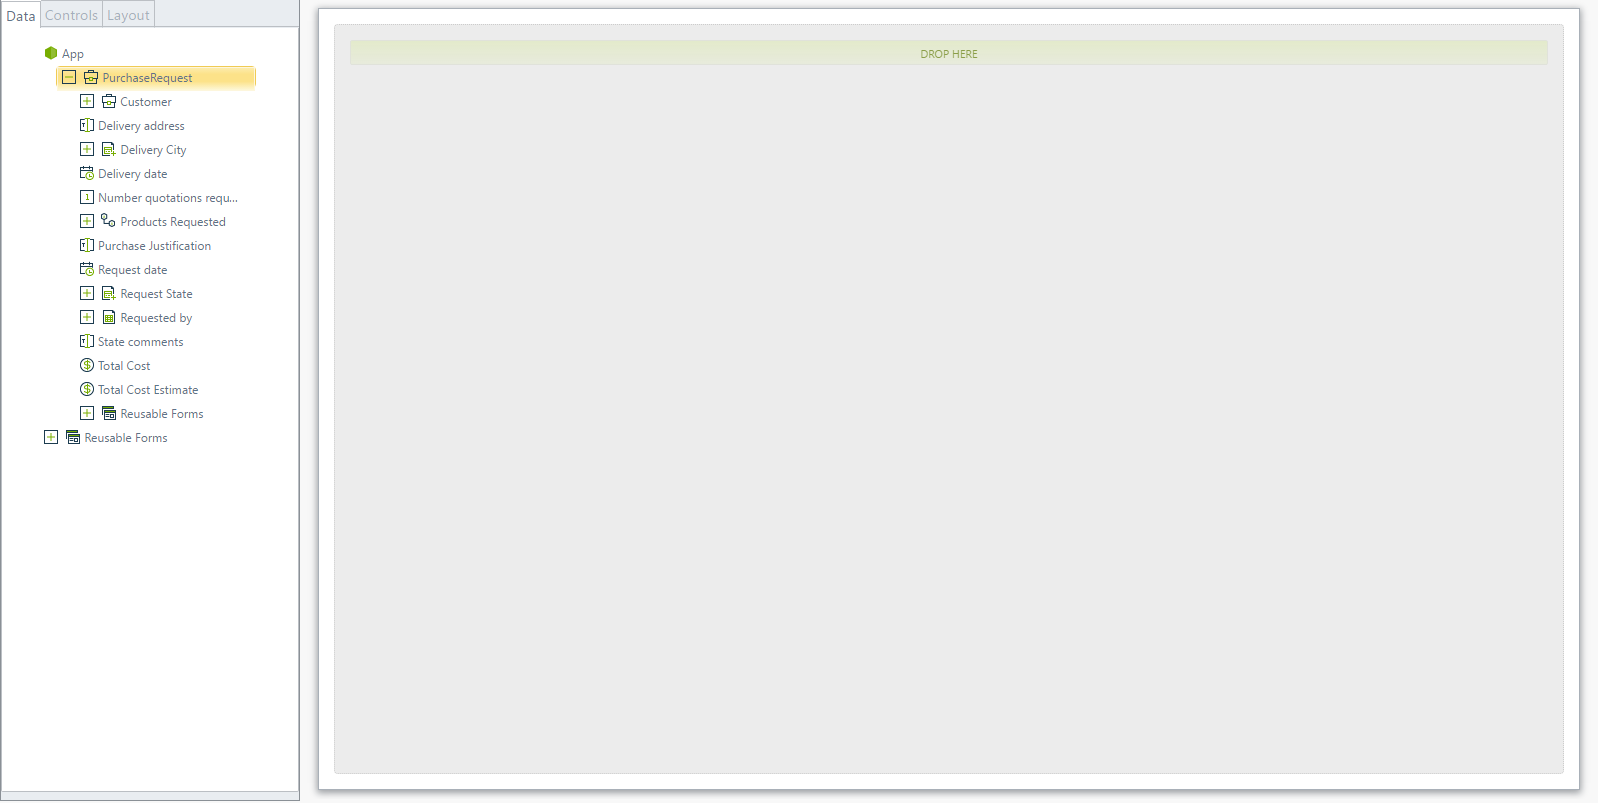
Go to the third step of the Process Wizard. When the process model displays, click the Task to create or edit its Form.
The Forms Designer will display. If there is no Form previously built, the Forms Designer will show a blank display area.
-
Arrange the data in three containers onto the Form.
-
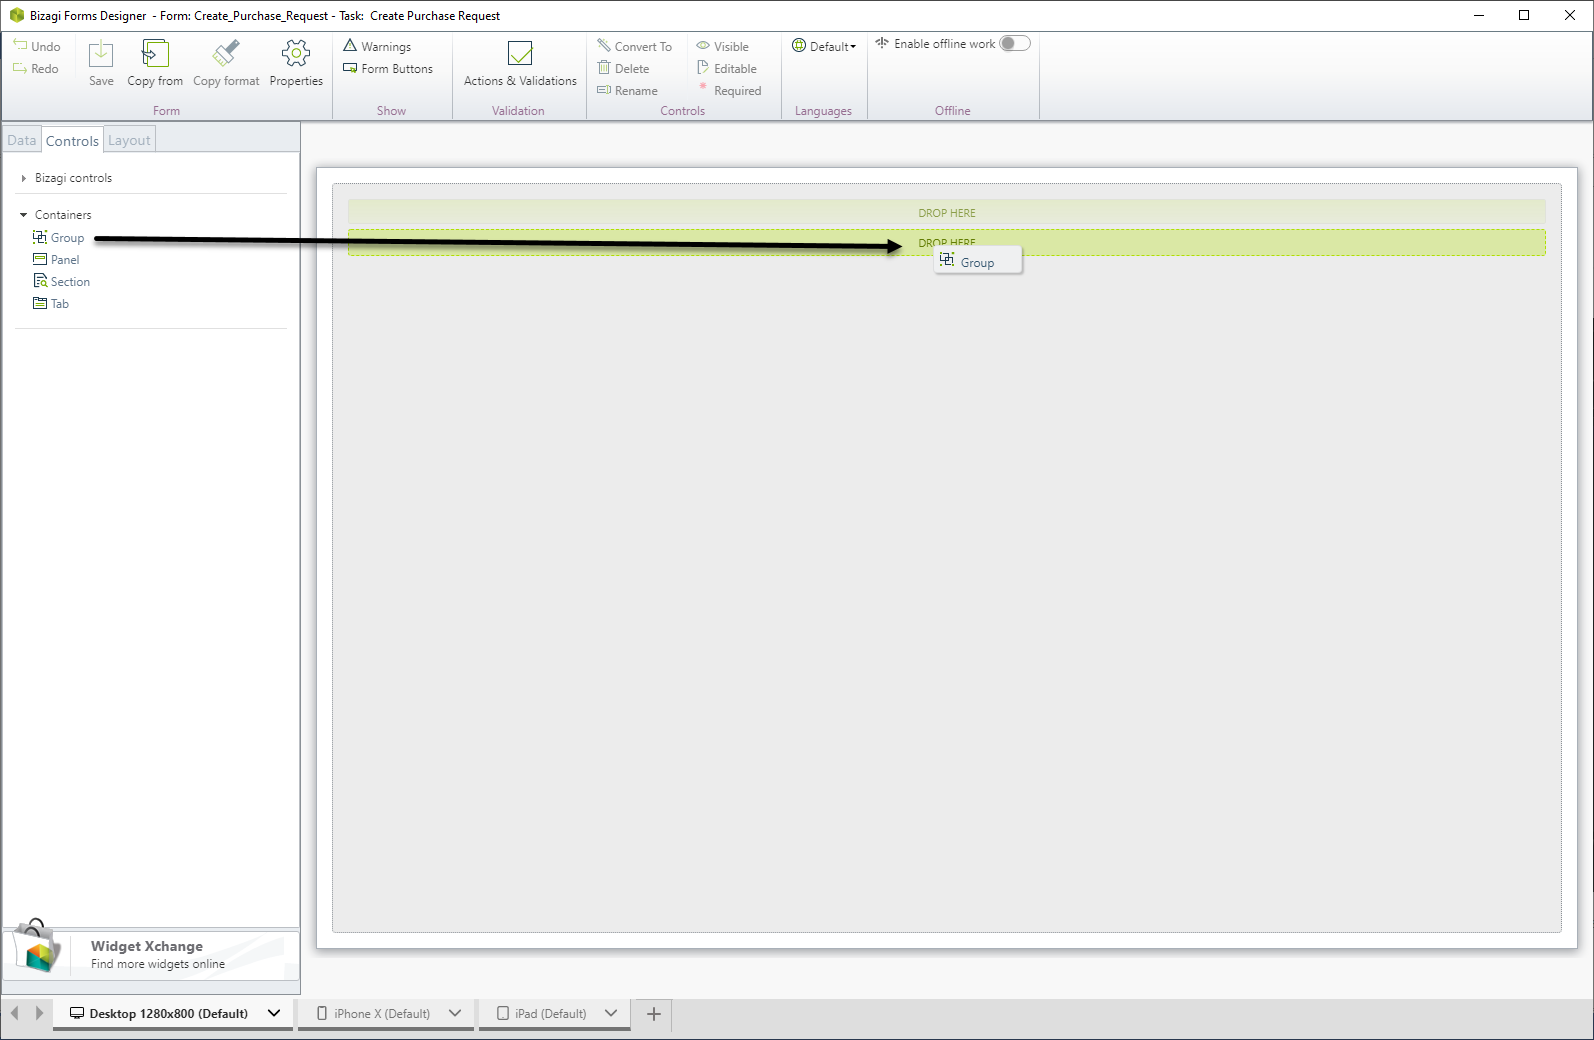
Go to the Controls tab on the left pane.
-
Select the Group Control in Containers and drag and drop three Groups.
Tip: When you drag an item from the left pane, the DROP HERE section will highlight as you hover the mouse cursor over the display area.
You can also double-click on the items to automatically include them at the bottom of the Form.
-
-
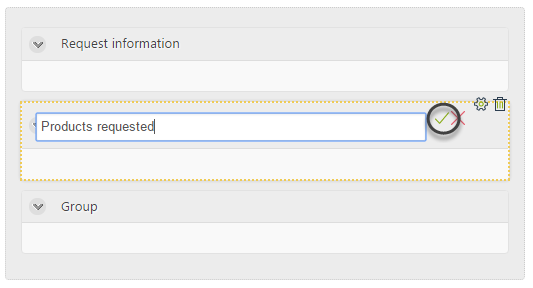
Name each Group Control:
- Double-click on each group control to name it.
- Name the groups Request information, Products requested, and Delivery information.
-
Add attributes to the groups:
- Return to the Data tab.
- Drag and drop attributes from the data model to the desired position.
- Attributes will automatically convert into Controls based on their data types.
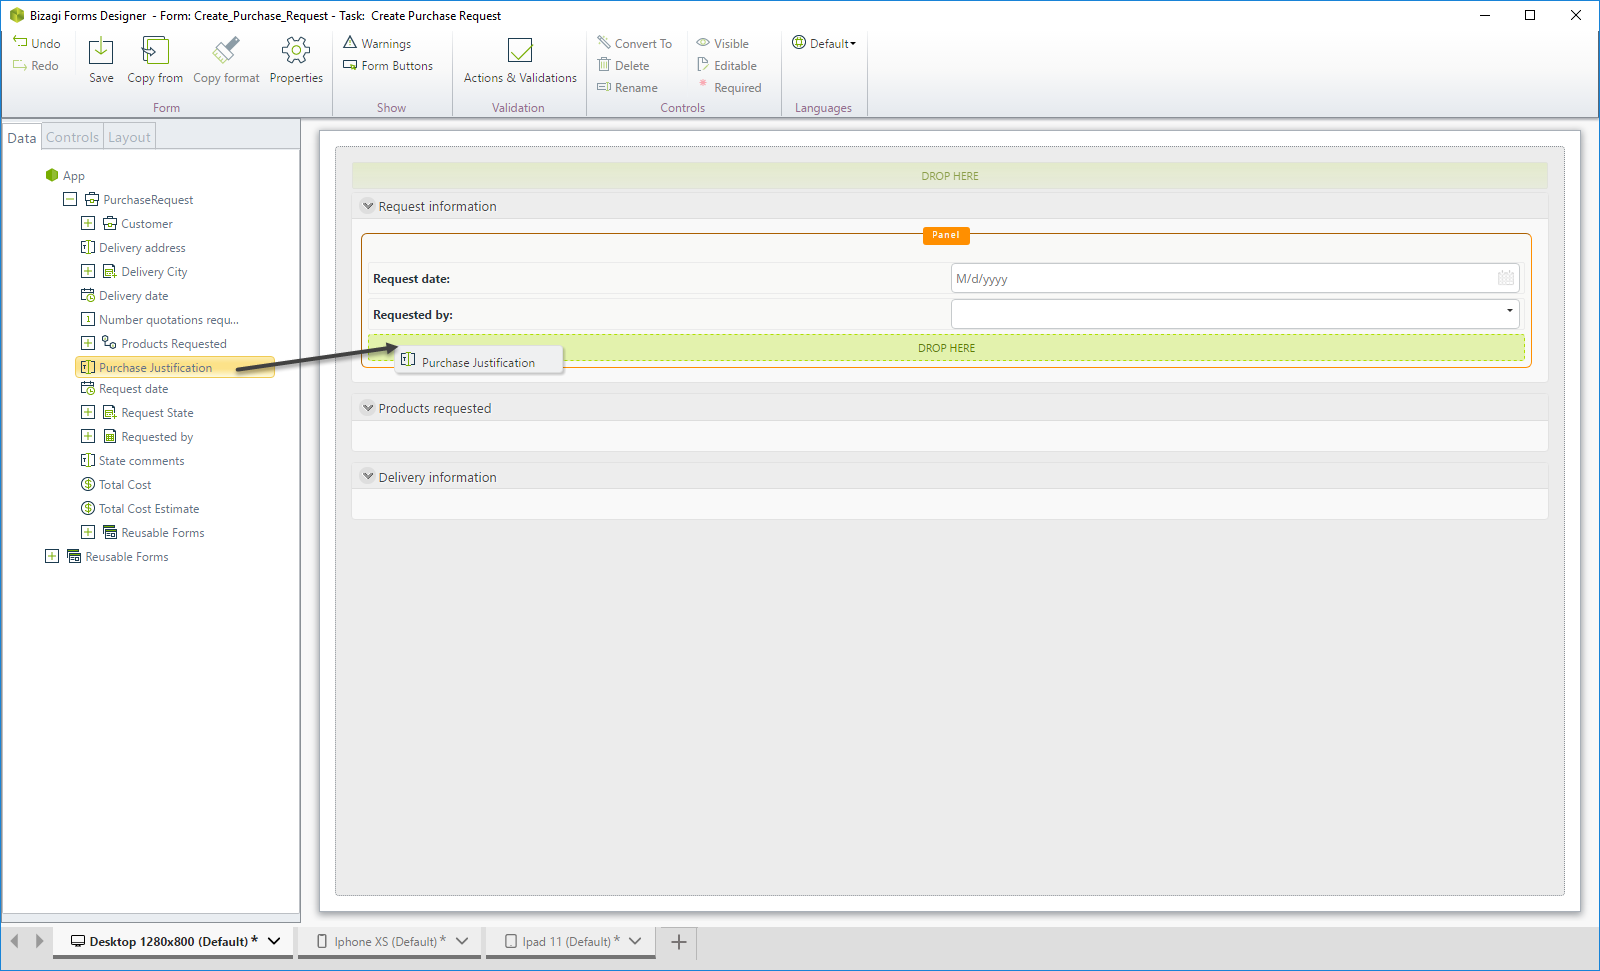
For the first group (Request Information), drag and drop:
-
Request date → Date Control
-
Requested by → Combo Control (drop-down list)
-
Purchase justification → Text Box Control
Bizagi automatically assigns the data type to the Control.
-
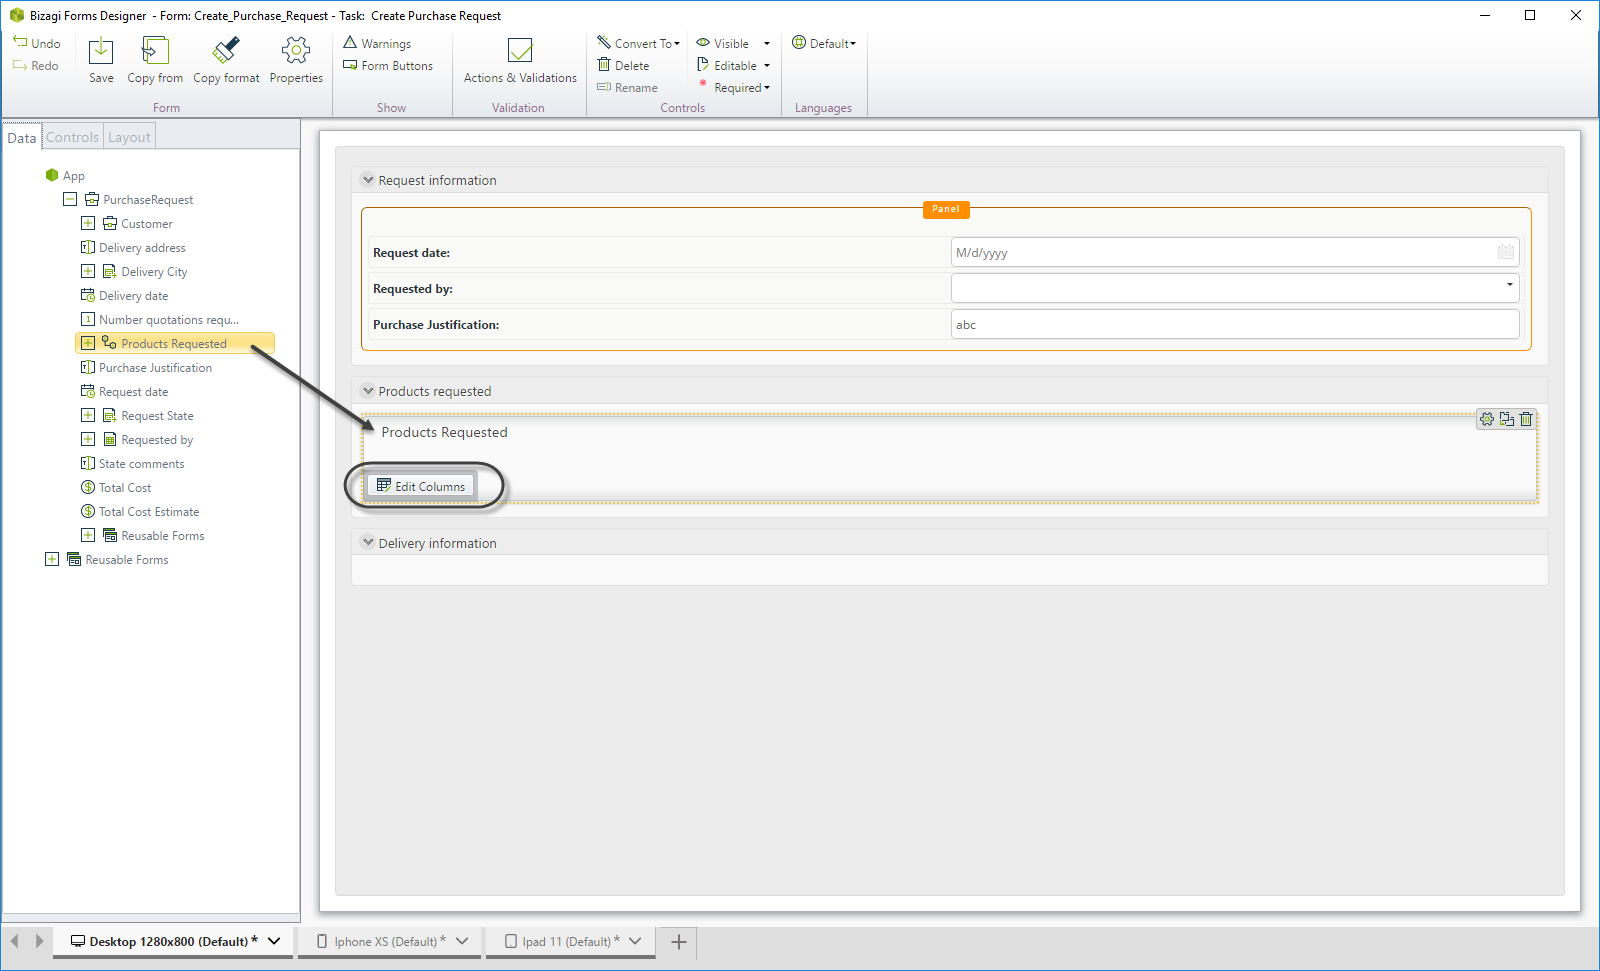
Add a collection to the second group:
- Drag and drop the Products Requested collection onto the second group.
- Collections are displayed as Table Controls.
-
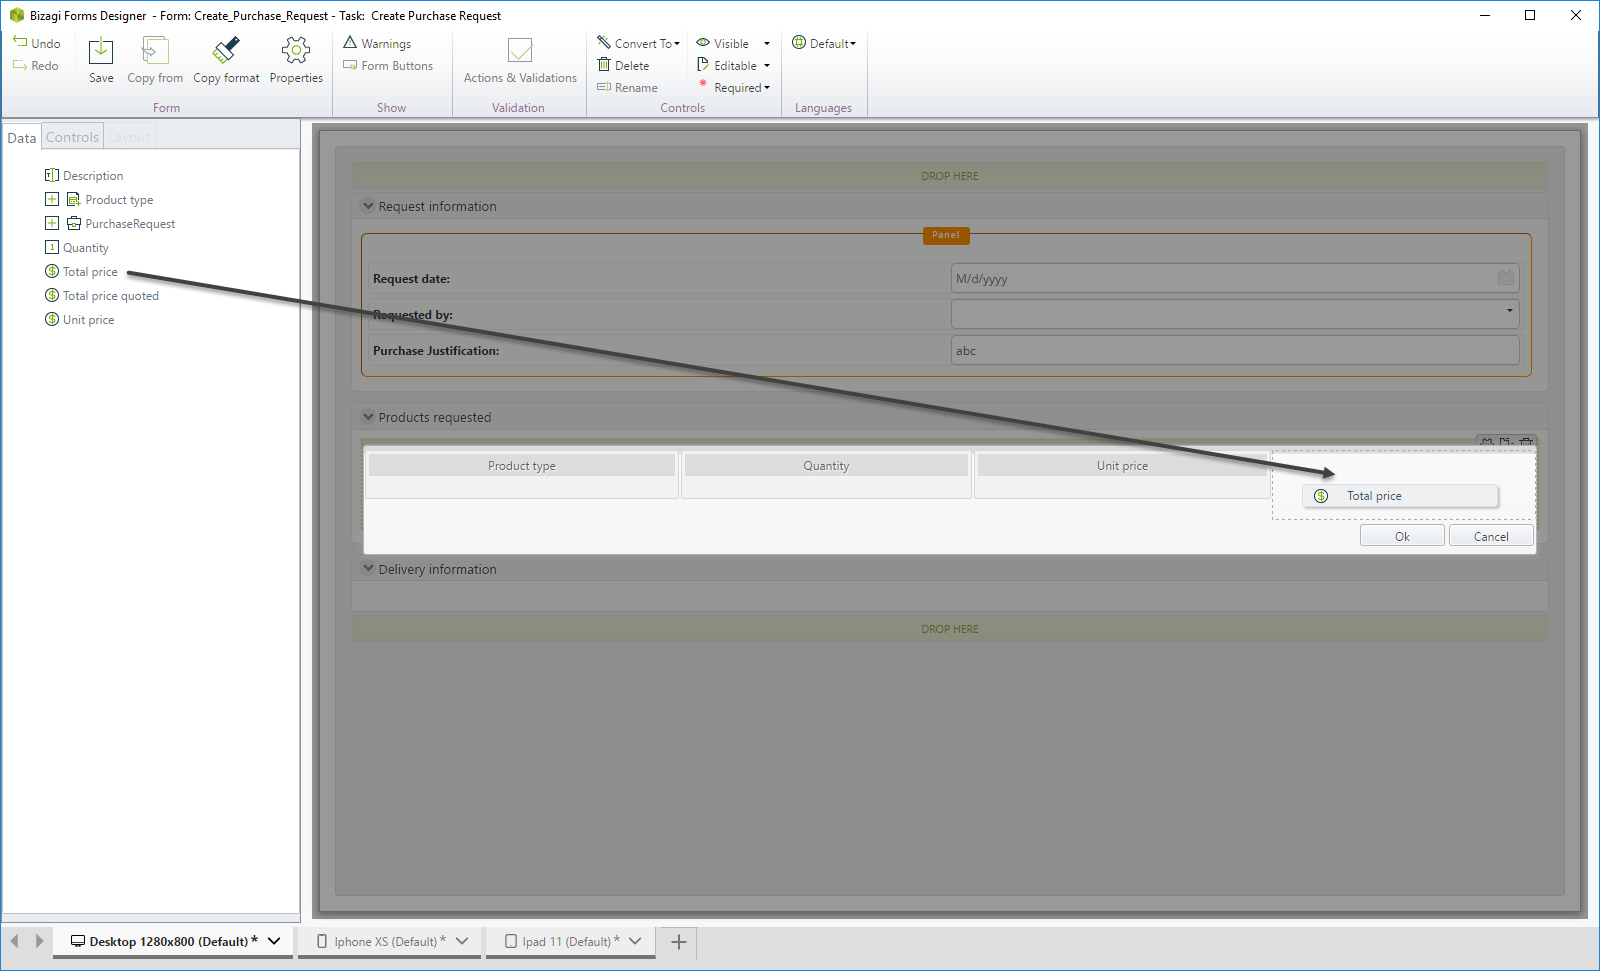
Edit Table Columns:
- Click on Edit Columns in the Table Control.
- Drag and drop the columns (attributes) you want to display.
- You can double-click the attributes to include them automatically.
Click OK when done.
-
Add attributes for the last group:
- Drag and drop the following attributes into the third group:
- Delivery address
- Delivery city
- Delivery date
- Drag and drop the following attributes into the third group:
-
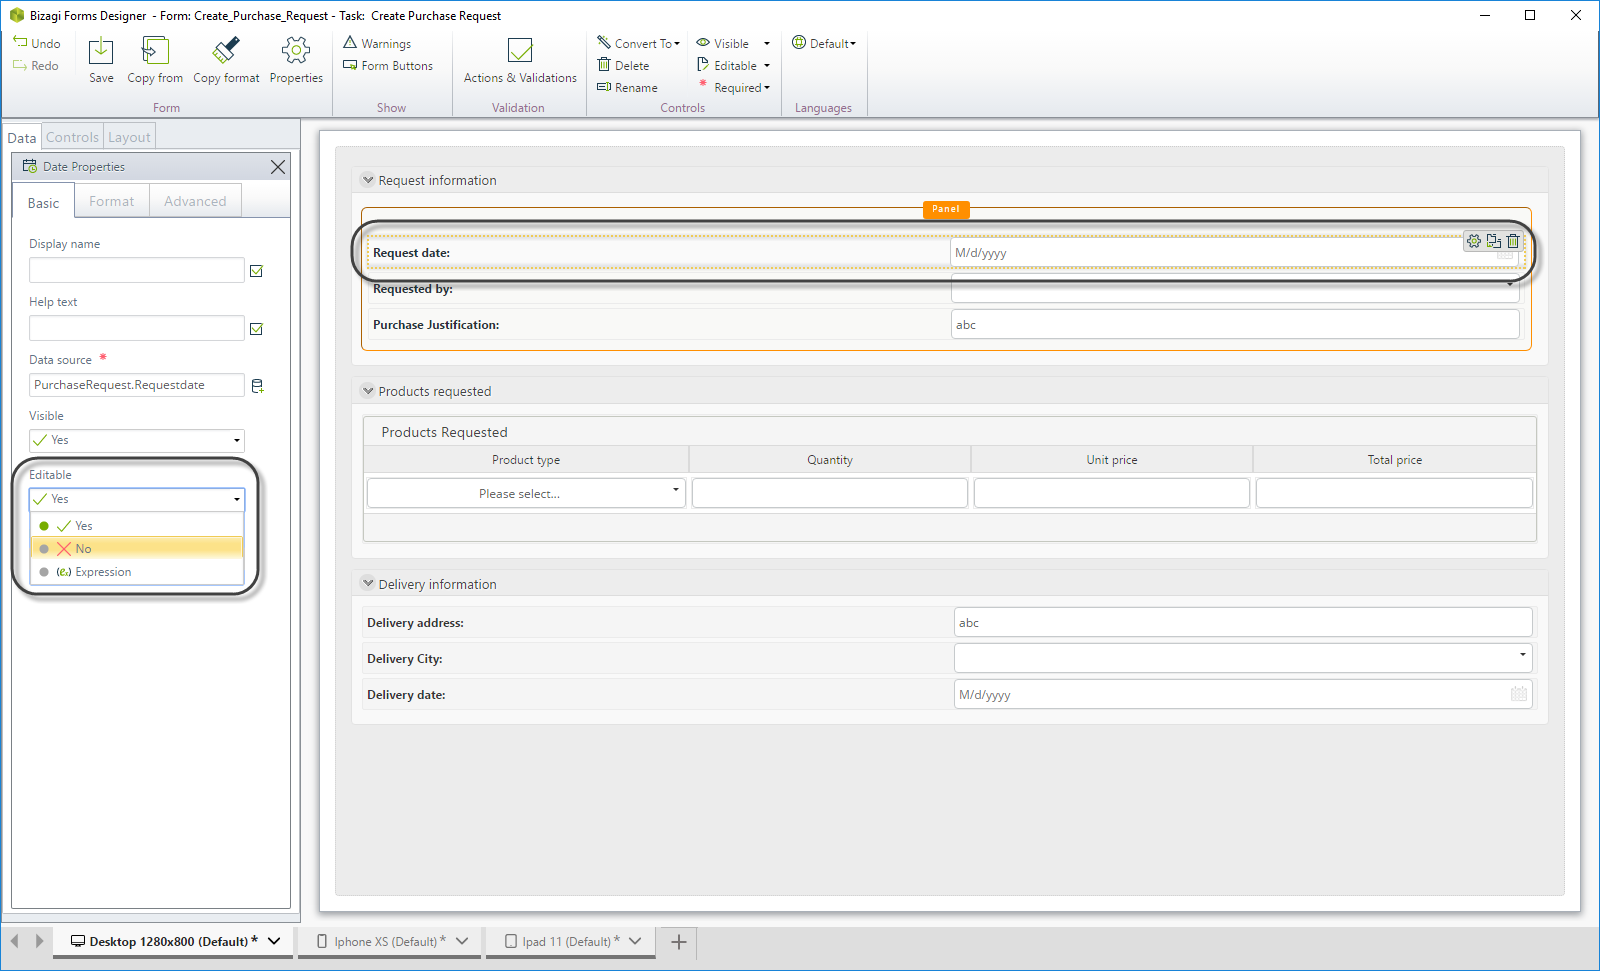
Set Controls as read-only:
-
The first two Controls (Request date and Requested by) should be read-only because they are pre-populated when the user enters the activity in the Work Portal.
-
To set a Control as read-only:
-
Click on the Control.
-
Access its properties in the left panel (or click the Gear icon at the top-right corner of the Control).
-
Change the Editable property by selecting the Cross icon (X).
-
Note: Read-only Controls are no longer highlighted as mandatory (red bar removed).
-
Summary
You now have a functional Form for the first activity in the Purchase Request Process. It includes:
- Organized data in three groups.
- Appropriate data types for each attribute.
- Read-only settings for pre-filled fields.
Repeat these steps for other human tasks to complete the Process Forms.